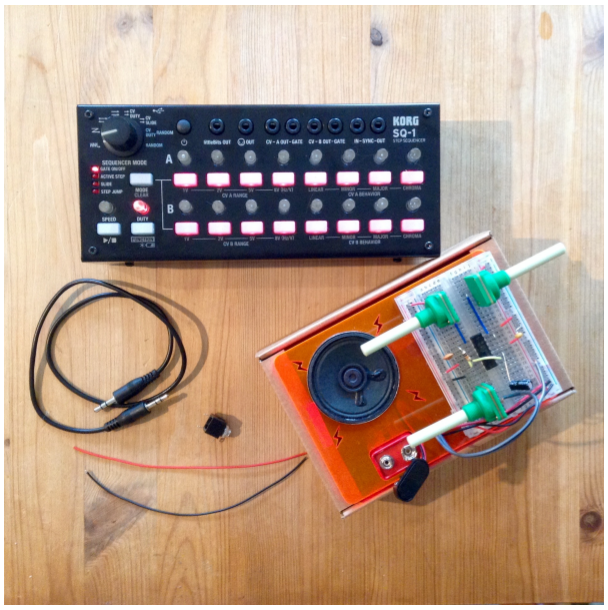
In this short tutorial I will show you how to sequence the Techwillsaveus Synth Kit using very few extra parts and a Korg SQ-1 Sequencer. You can of course use any hardware that outputs a control voltage signal but as the SQ-1 is a good option, so lets get started!
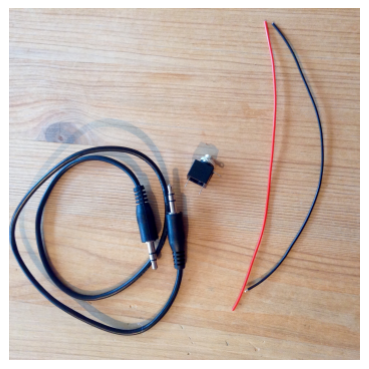
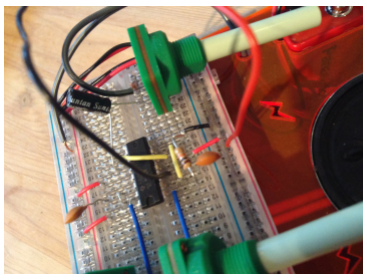
For this you will need a 3.5mm mono output/ input jack, a couple of wires(I’m using solid core for this as it’s easier to connect to the Synth Kit breadboard). You will also need either a mono or stereo 3.5mm cable to connect the sequencer to the Synth kit.Solder the mono jack like so. The positive goes to the tip connection and negative to the sleeve connection. If you are unsure of what wire goes where check the Audio Jack tutorial here: https:// http://www.techwillsaveus.com/resources/diy-synthaudio-jack/ It’s the same process.Once the jack socket is finished connect the negative to pin 3(CV in) on the IC chip and the positive the the power rail.
And to finish….
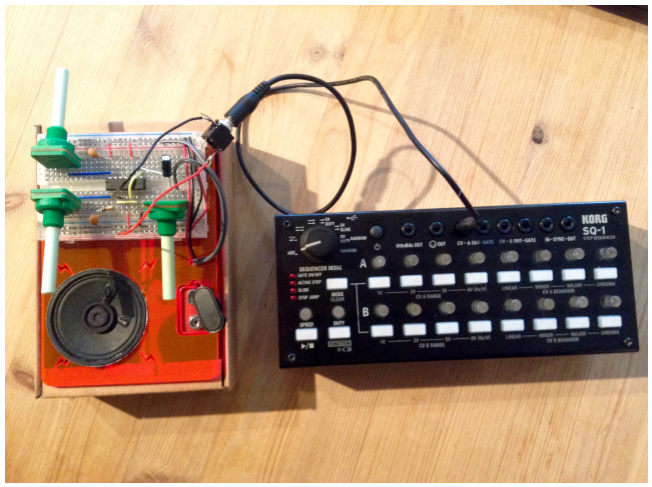
Now you can connect up the cable from the CV out of the Korg SQ-1 to the jack socket connected to the Synth Kit. Connect the battery on the Synth Kit and power on the SQ-1 and you now have a sequenced synth! By using a set up like this you can easily integrate the Synth Kit with other things like drum machines and other hardware, and it’ll all keep in time too!!
Richard Hider is a UK based Composer/Songwriter of Electronic/ Ambient/Soundtrack music.
Going by the artist name of TONAL AXiS, Richard has worked with the likes of Rob Papen(RPCX), LinPlug, Mackie, Nucleus Soundlab on various music demos for Software Synths(VST) and DAW's. He has also remixed for Subsonar(Tim Bran) and Lucia Holm(Sunscreem).
'I started composing music as a teenager, writing using a couple of hardware Synths, but then progressed to using a PC and mixing software and hardware to get my sound. I feel that I have a very individual style and love to create music in various styles.'
View all posts by TONAL AXiS